Abstract: S3 is meaningful to Airwheel, as it initiates the 2-wheeled electric scooter era and end the nightmare for a great number of beginners. The following illustrates the repair steps of changing control board and drive board.
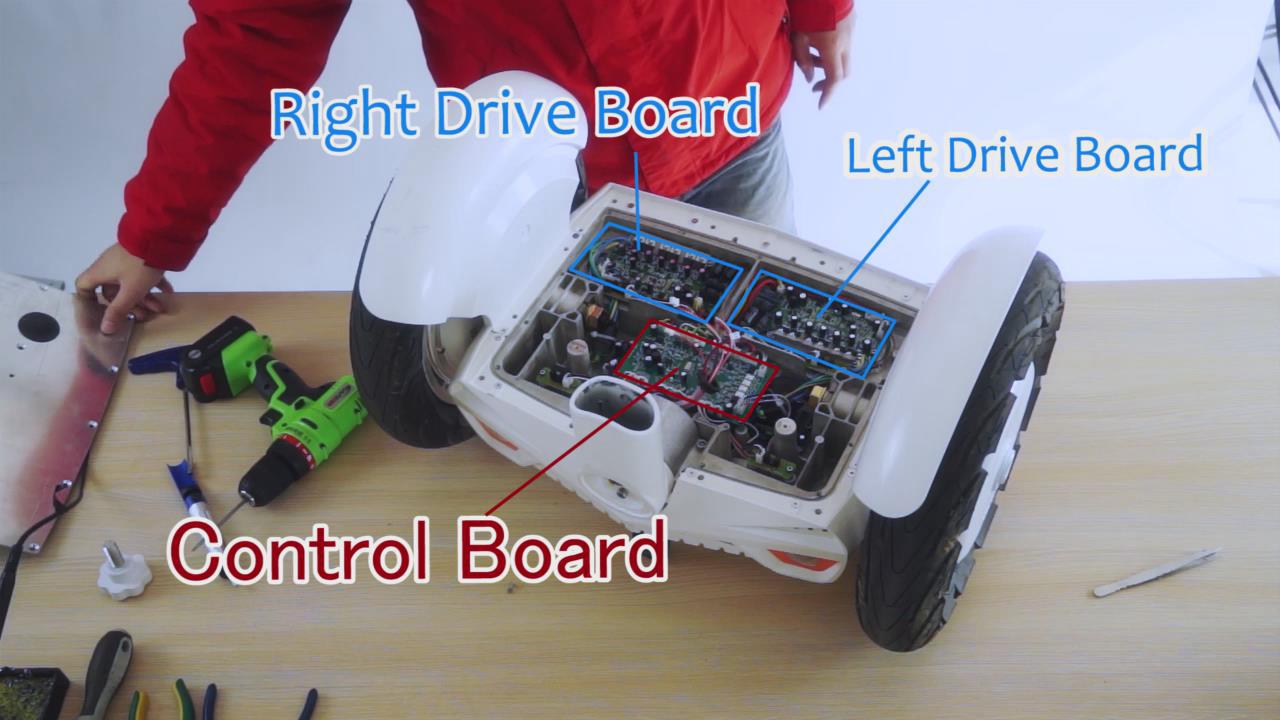
Please take photos of wire connection patterns before you star removing parts at every step (you also can see this video from http://www.airwheel.net/home/repair more detailed). There are 13 steps to finish the change of Airwheel S3's control board and drive board. The first four steps are relatively easier. 1. Remove the control shaft. 2. Remove the battery. 3. Remove the foot platform. 4. Remove the aluminium plate. After all these steps done, you will see both the right and left drive board and the main control board.
http://www.airwheel.net/home/aftersale
.jpg)
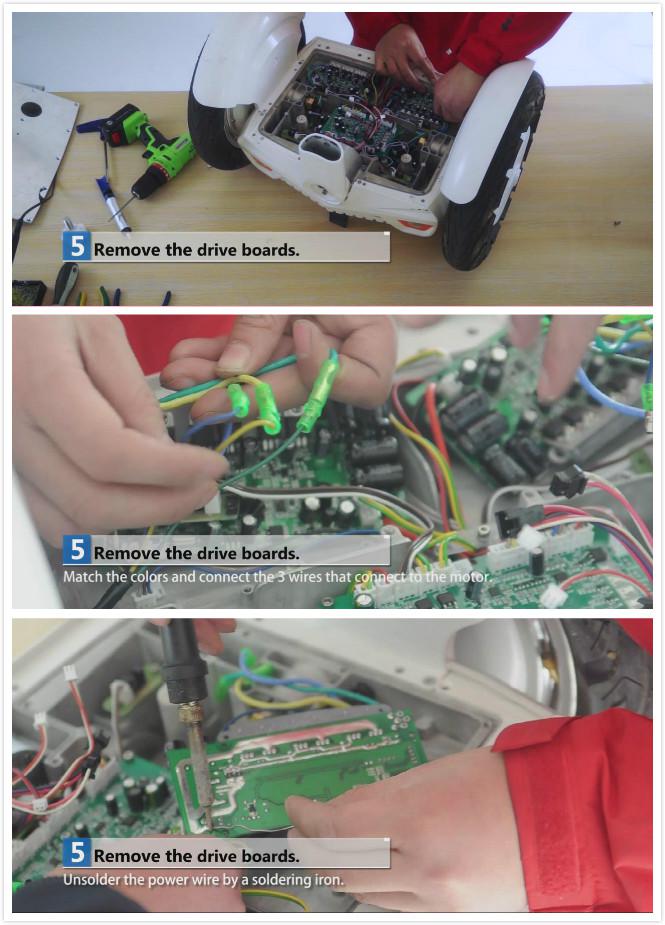
The fifth step is to remove the drive board. Take a photo of the wire connection pattern first. Unplug the power wire first and discharge the battery residual on the board. Match the colours and connect the three wires that connect to the motor. Unsolder the power wire by a soldering iron. The sixth step: remove the other drive board as per the above mention.
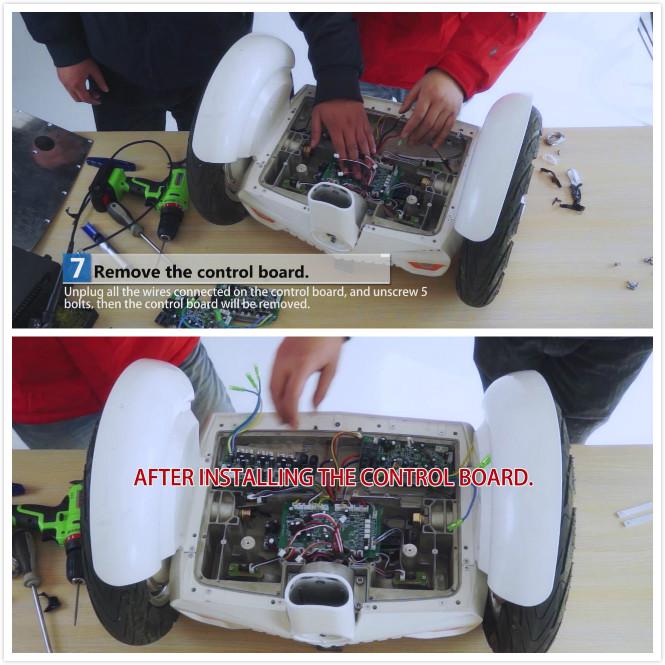
7: Remove the control board. Unplug all the wires connected on the control board, and unscrew five bolts, then the control board will be removed.
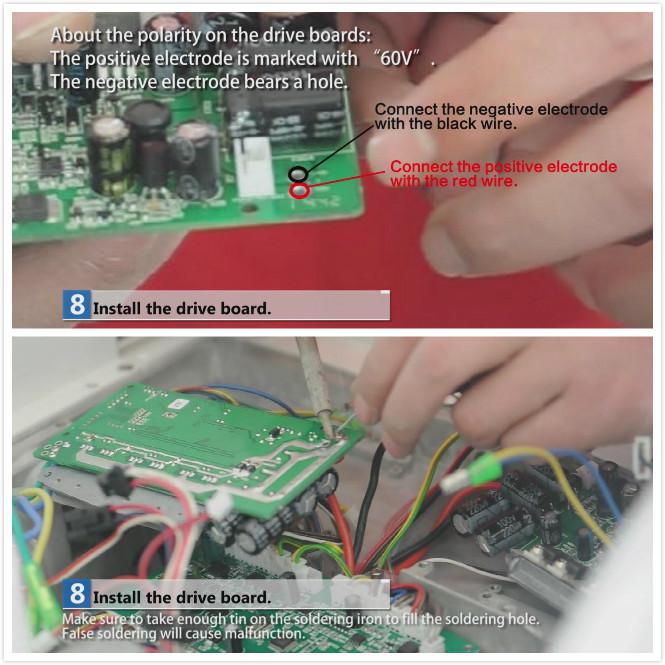
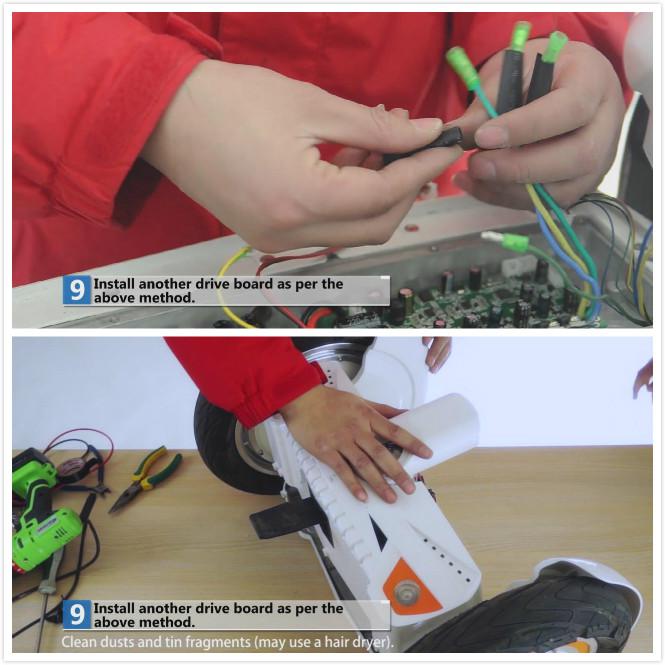
The eighth step is to install the drive board. You need to connect the negative electrode with the black wire and the positive electrode with the red wire. About the polarity on the drive boards: the positive electrode is marked with “60v”. The negative electrode bears a hole. Make sure to take enough tin on the soldering iron to fill the soldering hole. False soldering will cause malfunction. Then cut off the protruded part to avoid touch on the board. Put in the conductive silicon on strips before installing the drive board. Test if there is any short circuit problem. Fasten the joint on the drive board. Wrap the thermal shrinkable shelve around the wire joint, make sure the wires are solidly connected as per matching colour.
Then, it is to install another drive board as per the above mentioned. Clean dusts and tin fragments (may use a hair dryer).
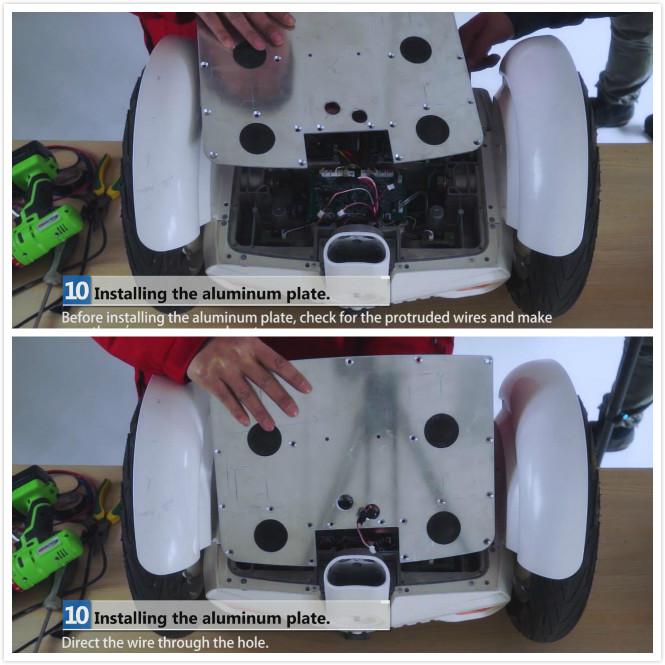
The tenth step is to install the aluminium plate. Before installing the aluminium plate, check for the protruded wires and make sure there is no squeezed part. Direct the wire through the hole.
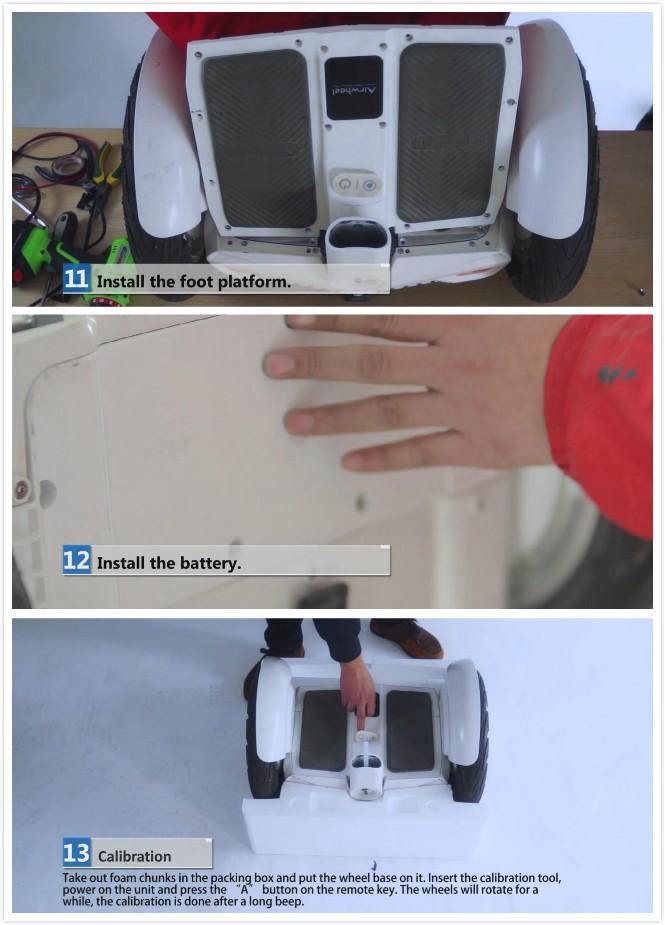
The last three steps are easier to be done. 11. Install the foot platform: The white socket of the Bluetooth board should be connected with the black and red power wires and then insert two speaker wires. 12. Install the battery and 13. Calibration: Take out foam chunks in the packing box and put the wheel base on it. Insert the calibration tool, power on the unit and press the “A” button on the remote key. The wheels will rotate for a while, the calibration is done after a long beep.
To have an explicit description, please visit https://www.youtube.com/watch?v=DN2il9sEdZ0.